Proving Income for an Italian Visa: Showing Funds Held Across Two Countries
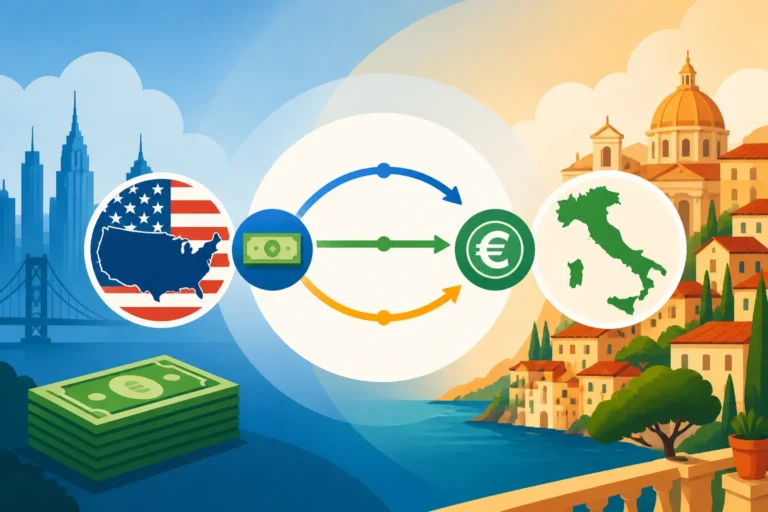
Your pension lands in a UK account, your savings sit in a US brokerage, and the Italian consulate wants one clear picture of your finances. That is where many visa applications stall. This guide shows how to document money split across two countries so a visa officer can follow it, and how to consolidate and present those funds without raising red flags.
Disclosure: This post may contain affiliate links. We may earn a commission at no extra cost to you if you make a purchase through these links. Read full disclosure.
Why Split Finances Confuse Italian Consulates
I have been through this myself. My income came from two directions: freelance invoices paid in one currency and rental income from a flat back home in another. When I sat down to build my visa file, I had good finances but no tidy way to show them. Nothing was hidden. Everything was simply scattered, and a consular officer has neither the time nor the patience to piece it together.
What the Officer Is Actually Looking For
The officer reviewing your file is checking three things. First, that the money exists. Second, that it is really yours and not borrowed for the photo op. Third, that it will keep supporting you once you are in Italy. For an elective residence application, that means stable passive income. For a digital nomad or self-employment route, it means earned income with a believable track record. Thresholds and accepted income types differ by visa, so start with What Income Do You Need for an Italy Elective Residence Visa? or What Income Do You Need for the Italy Digital Nomad Visa? depending on your route.
When your money sits in two countries, the officer has to do extra work on every one of those checks. They have to convert currencies in their head, match deposits to sources, and confirm that two statements with different formats, languages and date ranges describe one person’s finances. Each extra step is a chance for doubt, and doubt in a consular file usually means a request for more documents or a refusal.
Picture Margaret, a retired teacher from Ohio. Her state pension and a small annuity pay into a US checking account, while an inheritance from her British mother sits in a UK savings account in pounds. Each account looks modest on its own. Together they comfortably meet her consulate’s expectations. If she submits two unrelated statements with no explanation, the officer may assess only the account in front of them and decide she falls short.
The Currency Problem Nobody Warns You About
Italian consulates think in euros. Your statements are in dollars, pounds, Swiss francs or reais. Officers usually convert using a reference rate on the day they review the file, not the day you printed your statements. If your currency weakens between submission and review, a file that cleared the threshold on paper can look short.
This is why expats with funds in more than one country tend to build a buffer well above the minimum and show the euro equivalent clearly. Some go further and hold a meaningful share of their reserves in euros before applying, which removes the guesswork entirely. For a closer look at what holding several currencies costs, see Holding Euros, Pounds, and Dollars in One Account: What Converting Costs.
Red Flags That Split Accounts Can Trigger
The pattern that alarms officers most is a large lump sum arriving shortly before the application. From their side, that looks exactly like a relative lending you money so you can pass the check. Ironically, moving savings from one country to another to tidy up your finances produces that very pattern.
Other common triggers include statements that do not show your full name and address, screenshots instead of official documents, gaps in the statement period, and income that cannot be traced to a source. I cover the broader list in Avoiding Common Italian Visa Denials: Tips, but for a two-country applicant the lump-sum issue is the one to plan around.
Building a Proof-of-Funds File Across Two Countries
You have two broad strategies: present each account separately with a clear explanation, or consolidate into one account well ahead of time. Most people do a mix of both. Here is how each works.
Option One: Presenting Each Account Separately
This is the most transparent route, and many consulates are comfortable with it as long as the file is organised. The trick is to stop thinking of it as “two statements” and start thinking of it as “one financial story told by two documents.”
- Request official statements from each institution covering the period your consulate specifies, with your full name, account number and the institution’s details visible on every page.
- Ask each institution for a signed or stamped balance letter if your consulate expects one. Traditional banks often charge for this and can take time, so ask early.
- Prepare a one-page summary listing each account, its currency, the current balance, the regular income it receives and the euro equivalent with the reference date you used.
- Add documents showing the source of income: pension award letters, rental contracts, dividend statements or client contracts.
- Arrange translations and legalisation where required. Rules vary by consulate and document type, so see Documents that need official translation for an Italian visa and Apostilles and Sworn Translations for Italian Visas before you pay anyone.
The weakness of this approach is effort. Two institutions mean two sets of paperwork, two timelines and two places where something can go wrong. If one bank’s statement arrives late or without a stamp, your whole appointment can slip.
Option Two: Consolidating Into One Account Early
Consolidation means picking one account to act as the hub of your finances and steering income into it long before your appointment. Done early enough, the hub account shows a steady history of deposits and a healthy balance, with no suspicious last-minute lump sum.
The key word is early. If you consolidate, do it as soon as you start seriously planning the move, not when you book the consulate appointment. Keep statements from your original accounts too, so you can show where the transferred money came from. A transfer with a clear paper trail from your own account in another country is easy to explain. An unexplained deposit is not.
Back to Margaret. If she moves her pound savings into a euro balance in stages over many months, keeps her UK statements showing the outgoing transfers, and has her US pension continue arriving where it always has, she ends up with a clean file: one euro balance with documented origins plus one predictable income stream.
Comparing the Two Approaches
| Factor | Separate Accounts | Consolidated Hub Account |
|---|---|---|
| Effort to prepare | High, with paperwork from each institution | Lower at application time, more planning beforehand |
| Currency risk at review | High if funds stay in non-euro currencies | Reduced if the hub holds euros |
| Lump-sum red flag risk | Low, since money stays put | Low only if consolidated early with a paper trail |
| Clarity for the officer | Depends on your summary sheet | High, with one main statement to read |
| Best suited to | Applicants with stable, long-standing accounts | Applicants planning months ahead |
How Wise Simplifies Multi-Country Proof of Funds
This is where I tell you what actually made my own file manageable. Once I opened a Wise account, the jumble of accounts became one dashboard, and the file I handed over made sense on first read.
One Account, Several Currencies
Wise lets you hold balances in multiple currencies side by side and gives you local account details in several of them. You can receive pounds like a UK account holder, dollars like a US account holder and euros through a European IBAN, all inside the same account. For someone with income in two countries, that is the consolidation hub described above, without opening a new bank account in each country.
In practice, your UK pension or rent can land in your pound balance, your US income in your dollar balance, and you decide when to convert into euros. Wise converts at the mid-market exchange rate and shows its fee upfront, so there is no hidden markup buried in the rate. Fees vary by currency route and change over time, so check the Wise pricing page for the figures that apply to you.
Converting in planned stages instead of all at once does two things. It spreads your currency risk, and it builds a steady, documented euro balance over time, which is exactly the history a visa officer wants to see.
Statements That Tell a Clear Story
The documents are what matter at the consulate window. From a Wise account you can download official statements for each currency balance over the date range you choose, with your name and account details on them. You can also generate documents confirming your account details. Every incoming payment shows its sender, so the officer can see your pension provider or client paying you directly instead of an anonymous deposit.
A smart move is to submit the Wise statement as your main proof alongside statements from your original accounts showing the outgoing transfers. That combination answers the “is this really your money?” question before it is asked.
One honest caveat from experience: consulates are not uniform. Some accept statements from licensed digital financial providers without fuss, while others prefer a traditional bank letter with a stamp and signature. Wise is generally regulated as an electronic money institution rather than as a traditional bank in many jurisdictions, and some consular staff know that distinction well. Before your appointment, check your consulate’s own requirements page or ask in writing. If they insist on a bank letter, keep one traditional account in the mix and use Wise for the multi-currency history and conversions.
A Step-by-Step Setup for Visa Applicants
- Open a Wise account in your own name and complete identity verification well before you plan to apply, since larger balances and transfers can require extra verification. See Wise Transfer Limits for Italy: Caps, Thresholds, and Verification Tiers for how those tiers work.
- Add the currency balances you need, typically your home currency or currencies plus euros.
- Redirect recurring income such as pensions, rent or client payments to the matching local account details, so the deposits build a visible history.
- Move savings across from your other accounts in planned transfers, keeping the outgoing statements from each source account.
- Convert into euros gradually so your reserve in the visa’s working currency grows steadily.
- Before your appointment, download statements for each balance covering the period your consulate asks for, and print your account details confirmation.
- Write a one-page summary linking each balance to its source document, with euro equivalents and the reference date.
Who Benefits Most From This Setup
Retirees with pensions in one country and savings in another gain the most. Combine this with Receiving a Foreign Pension in Italy: Cheapest Route for a Recurring Transfer to plan the post-arrival setup. Freelancers with clients in several currencies come next, because invoices paid into matching currency balances make income easy to trace. If that is you, read Acceptable financial proof for Italy self-employment visa for what the officer expects to see alongside your statements.
Remote employees paid by a foreign employer benefit too, mainly because payslips can be matched against clean, labelled deposits. Even dual-citizenship applicants who need to show modest funds for a family member find the single-dashboard view easier to explain.
Avoiding Mistakes at Your Consulate Appointment and Beyond
Getting the money in order is half the job. Presenting it well, and keeping it tidy after you arrive, is the other half.
Assembling the Final Financial Pack
Organise your financial documents in the same order as your summary sheet, so the officer can flip from line to page without hunting. I use this structure:
- Summary sheet listing every account, currency, balance and euro equivalent with the reference date
- Main hub statement, such as your Wise multi-currency statement
- Statements from source accounts showing transfers into the hub
- Income source documents such as pension letters, leases or client contracts
- Any bank letters your consulate specifically requests
- Translations and apostilles where required
Print everything, keep a second full copy, and bring digital versions on your phone. Never rely on showing a banking app on screen as your only proof. Officers want paper or official PDFs, not a live dashboard they cannot keep. Visa fees are a separate matter from proof of funds; for payment methods consulates accept, see Paying Italian Visa and Consulate Fees From Overseas: What Gets Accepted.
Handling Tough Questions About Your Money
If an officer asks about a particular deposit, answer calmly and point to the document that explains it. “That is the transfer from my UK savings account, and here is the outgoing statement” ends the conversation. Rambling or guessing prolongs it.
Expect questions about why you hold money in different places. The honest answer, that you have lived and worked in more than one country and your income still arrives from both, is perfectly normal. Italian consulates see multinational finances constantly. What they dislike is vagueness, not complexity.
If the officer asks for something you have not brought, do not argue. Ask whether you can send it later and how. Many consulates allow follow-up documents, and a polite, prompt response often rescues a file that looked shaky at the counter.
Keeping Your Finances Visa-Ready After You Arrive
Proof of funds does not end once the visa is stamped in your passport. You will apply for your residence permit after arrival, and later you will renew it, which usually means showing your finances again. Keeping the same hub-account structure makes each round easier, because you already have a continuous, documented history. Timing and documents for that stage are covered in Renewing Your Permesso di Soggiorno in Italy: Timing and Steps.
Large sums entering Italy can also draw questions from Italian banks once you open a local account, so keep your transfer records and source documents. See Bringing Your Savings Into Italy: Declaring Large Transfers and Bank Scrutiny for how that scrutiny works. For the stretch between landing and getting a local account, a multi-currency setup like Wise lets you spend and pay rent in euros straight away; see Your First Two Weeks in Italy: Paying for Things Before You Have a Local Account.
My last piece of advice is simple. Start building your financial story the moment you decide to move, not the week before your appointment. If your money lives in two countries, open a Wise account early, route your income into matching currency balances, convert into euros steadily, and let the statements build a history that speaks for itself. The officer should be able to read your finances in a minute. When they can, the rest of the application tends to follow.
Disclaimer
This article is for general informational purposes only and does not constitute professional advice. Laws, prices and regulations vary by location and change over time. Consult a qualified professional for guidance on your specific situation.