How to get Italian visa photos taken correctly
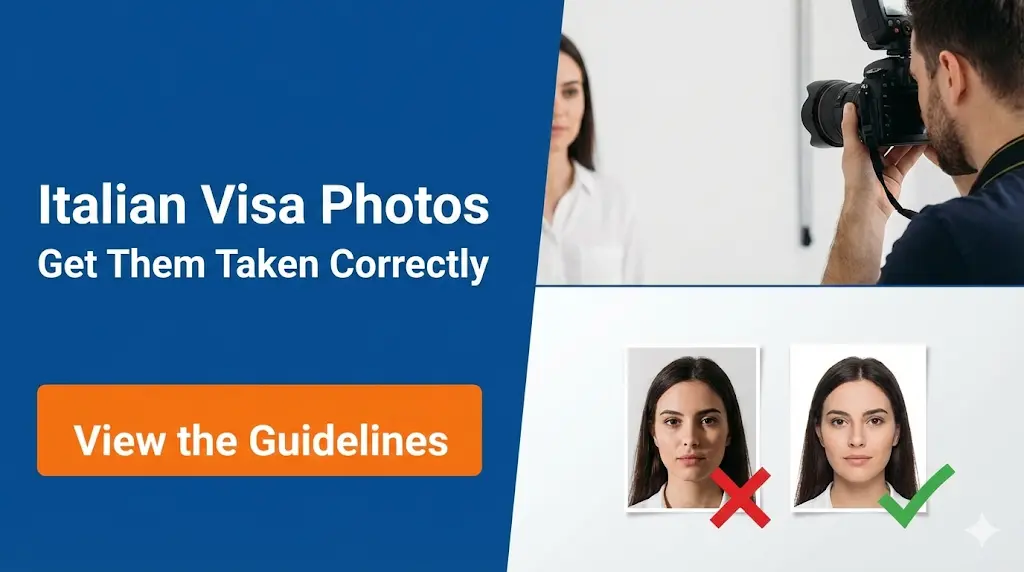
Learn exactly how to get Italian visa photos taken correctly. This comprehensive 2026 guide covers the strict 35x45mm dimensions, background requirements, attire, lighting, and biometric standards to ensure your Schengen or National visa application is accepted without delays.
Disclosure: This post may contain affiliate links. We may earn a commission at no extra cost to you if you make a purchase through these links. Read full disclosure.
Introduction
Whether you are planning a two-week holiday traversing the Amalfi Coast, studying abroad in Florence for a semester, or relocating to Milan to begin a new career, securing your visa is the critical first step. The visa photograph serves as the cornerstone of your official biometric identity within the European Union’s immigration databases. It is the image that border guards will compare against your face when you land in Rome, and it is the image that will be permanently linked to your legal immigration file.
Given the high stakes, getting your Italian visa photos taken correctly is not an area where you should cut corners. Understanding the exact specifications—ranging from the precise 35×45 mm physical dimensions to the subtle rules governing facial expressions, eyewear, and lighting—is absolutely essential. While many applicants assume that any standard passport photo will suffice, US passport photos, for example, are a completely different size than European standard photos, leading to countless immediate rejections for North American applicants.
In this exhaustive guide, we will break down every single requirement for Italian visa photos. We will provide detailed instructions on size, resolution, background color, and attire. We will also explore the strict rules regarding glasses and religious headwear, provide a troubleshooting guide for photographing infants, and offer expert advice on whether you should visit a professional studio or attempt a DIY digital photo. By adhering strictly to these guidelines, you can submit your application with total confidence.
The Importance of Biometric Standards
To understand why the rules are so rigid, you must understand how your photo is used. Italian visa photos are not just visual aids; they are complex biometric data files. When your photo is scanned by the consulate, facial recognition software maps the unique geometry of your face—measuring the distance between your eyes, the distance from your chin to your nose, and the overall shape of your facial structure.
If your photo is tilted, if the lighting creates false contours, or if a pair of thick glasses obscures the exact location of your pupils, the software cannot create an accurate biometric map. If the software cannot map your face, the consulate cannot issue the visa. This biometric data is shared across the Schengen Area through the Visa Information System (VIS), meaning the photo you submit to the Italian consulate in your home country is the same data file that a German or French border guard might access if you travel across Europe.
Furthermore, as Europe implements the Entry/Exit System (EES) at its borders, your initial visa photo will be cross-referenced with live photos taken at passport control kiosks. Whether you are applying for a short-term tourist visa or trying to figure out Schengen visa vs Italian national visa: which to get?, the biometric photo requirements remain universally strict and identical across all categories.
Exact Dimensions and Sizing Requirements
The most critical physical attribute of your Italian visa photo is its size. The European Union utilizes the standard ICAO (International Civil Aviation Organization) biometric photo specifications, which are noticeably different from the standard dimensions used in North America and several other regions.
The Standard Measurements
Your printed photograph must measure exactly 35 millimeters in width and 45 millimeters in height (3.5 cm x 4.5 cm). If you are accustomed to imperial measurements, this translates to roughly 1.38 x 1.77 inches. If you submit a standard US 2×2 inch (51×51 mm) passport photo, the consular officer will reject it, as it will not fit into the designated scanning template on their official forms.
Head Size and Positioning
The overall size of the printed photo is only the first metric; how your head is positioned within that 35×45 mm frame is equally important.
- Face Coverage: Your face must take up between 70% and 80% of the entire photograph.
- Vertical Measurement: The distance from the very bottom of your chin to the crown of your head (the top of your skull, ignoring the volume of your hair) must measure between 32 mm and 36 mm. The photo will be rejected if the face measures less than 27 mm or more than 40 mm.
- Centering: Your head must be perfectly centered in the frame. The distance from the top of your head to the top edge of the photo should be approximately 4 mm to 5 mm, providing a small visual buffer.
- Horizontal Measurement: The width of your face, measured from ear to ear, should be between 16 mm and 20 mm.
- Eye Positioning: Your eyes must be located in the upper half of the photograph. The minimum distance between the center of your two eyes should be exactly 8 mm.
Summary Table of Size Specifications
To help you communicate these exact requirements to a professional photographer, or to check your own prints with a ruler, refer to the following specification table.
| Specification Feature | Required Measurement and Standard |
| Overall Photo Width | 35 mm (3.5 cm / 1.38 inches) |
| Overall Photo Height | 45 mm (4.5 cm / 1.77 inches) |
| Face Coverage Percentage | 70% to 80% of the total image area |
| Chin to Crown Height | 32 mm to 36 mm |
| Top Margin (Head to Top Edge) | Minimum of 4 mm from the top |
| Face Orientation | Full face, front view, looking directly at the lens |
| Number of Photos Required | Usually 2 identical photos (varies by consulate) |
Background Color and Lighting
After size, the background and lighting of your photo are the most heavily scrutinized elements. The goal is to create maximum contrast between your face and the background so that the biometric software can easily distinguish your silhouette.
The Plain Light Background
The background of your Italian visa photo must be plain, uniform, and light-colored. While many official guidelines specifically request a white background, a light grey background is also acceptable and sometimes preferred depending on your hair color.
- No Patterns or Textures: The background cannot have any patterns, wood grains, brick textures, or gradient shadows. It must be a solid, flat block of color.
- No Objects or People: There can be no other objects, chair backs, plants, or people visible in the background. You must be entirely alone in the frame.
- Contrast Rules: If you have very light blonde or white hair, a medium or light grey background is highly recommended to ensure your hair does not blend into the background. Conversely, if you have dark hair, a plain white or light grey background works perfectly. There should be no borders or extra margins on the final print.
Lighting and Shadows
Improper lighting ruins more visa photos than almost any other factor. The lighting must be perfectly uniform across your entire face and the background.
- No Shadows on the Face: You cannot have a shadow cast across one side of your face. This typically happens when the photo is lit by a single light source (like a window) off to one side. The lighting must be diffused and frontal to provide an appropriate brightness and contrast.
- No Background Shadows: You cannot cast a shadow onto the wall or backdrop behind you. To prevent this, you should step roughly one to two feet away from the background, and the photographer should use balanced lighting.
- No Flash Reflections: Your skin should not appear overly shiny or greasy due to a harsh camera flash. The lighting should show your natural skin tones accurately without washing out your features.
- No Red-Eye: The “red-eye” effect caused by direct flash is strictly prohibited. If your photo has red eyes, it will be rejected, and you cannot digitally alter the photo to fix it.
Attire, Grooming, and Appearance
What you wear and how you present yourself in your visa photo matters significantly. While there is no official “dress code,” common sense and biometric contrast rules apply heavily.
Clothing Choices
Because the background must be white or light grey, it is highly recommended that you wear dark or brightly colored clothing to create a distinct contrast between your shoulders and the background. If you wear a white button-down shirt against a white background, your head will appear to be floating, and the biometric scanner may struggle to identify the edges of your shoulders. Wearing lighter or the same colored clothes as the background can cause your silhouette to blend into the photograph. Furthermore, your attire should not feature loud, distracting patterns. Avoid wearing uniforms (such as military or police uniforms) unless specifically required for your job.
Hair and Makeup
Your hair must not obscure any part of your face. It is crucial that the edges of your face, from the bottom of your chin to the top of your forehead, are clearly visible.
- Bangs/Fringes: If you have long bangs, they must be swept aside or pinned back so they do not cover your eyebrows or your eyes.
- Ears: While the official rules state that it is preferable to have the ears exposed, it is highly recommended to tuck your hair behind your ears to clearly show both edges of your face.
- Makeup: Makeup should be kept natural and neutral. Avoid heavy contouring or theatrical makeup that significantly alters your everyday facial structure. Do not use cosmetic applications that change the appearance of your natural skin tone.
Facial Expression
The Italian consulate requires a perfectly neutral facial expression.
- No Smiling: You cannot smile, smirk, frown, or laugh with your mouth open. A large, toothy smile alters the shape of your cheeks and eyes, which disrupts the biometric mapping.
- Mouth Closed: Your mouth must be completely closed. Your teeth should not be visible.
- Eyes Open: Both eyes must be fully open, looking straight ahead directly into the camera lens. You cannot be looking down, looking up, or looking over your shoulder (portrait style). Your head must be perfectly level—not tilted up, down, or to either side.
Rules Regarding Eyewear and Head Coverings
Accessories are generally discouraged in visa photos, as they can obstruct the clear view of your face. The Italian Ministry of Foreign Affairs provides specific exemptions strictly for medical and religious reasons.
Glasses and Eyewear
The safest and most highly recommended approach is to simply remove your glasses for the photograph. The vast majority of photo rejections related to accessories involve eyeglasses. However, if you must wear glasses for medical reasons, you must adhere to the following absolute rules:
- No Tinted Lenses: Sunglasses, transition lenses, or lightly tinted prescription lenses are strictly forbidden. The lenses must be completely clear.
- No Glare or Reflections: There can be absolutely no flash reflection or glare on the lenses. Even a tiny speck of light reflecting off the glass that covers a portion of your iris will result in a rejection.
- Frame Placement: The frames of your glasses cannot cover any part of your eyes. Heavy, thick, or oversized frames should be avoided; wear lighter-framed glasses if you must wear them. If your frames obscure your brow line or rest heavily on your cheekbones, remove them.
Religious Head Coverings
Hats, caps, beanies, and headbands are strictly prohibited. The only exception to the headwear rule is for religious purposes or ethnic backgrounds (such as a hijab, turban, or yarmulke).
If you wear a head covering for religious reasons:
- The covering must not cast any shadows onto your face.
- Crucial Rule: Your entire facial features must be visible. The covering cannot obscure your forehead, your eyebrows, your cheeks, or your chin. The edges of your face must be completely clear from the bottom of your chin to the top of your forehead.
Understanding these strict physical presentation rules is essential before you begin compiling your larger application dossier. If you are ensuring your corporate paperwork is aligned, you should review the Italian Work Visa Requirements: Documents and Eligibility alongside your photo preparation to ensure your entire package is flawless.
Special Rules for Babies and Young Children
Photographing infants and toddlers for a visa application is notoriously difficult, but the Italian consulates do not waive the biometric requirements for minors. Babies must have their own photos that adhere to the 35×45 mm standards.
- No Other People in the Frame: The most common mistake parents make is holding the child in the photo so that the parent’s hands, arms, or cast shadows are visible behind the child. If the child needs to be held, it must be done in a way that the parents are completely invisible in the photograph. The child must be the only subject in the picture.
- No Props: There can be no pacifiers, bottles, toys, or blankets visible in the shot.
- Expression and Eyes: For infants, the consulates are slightly more lenient regarding the “neutral expression” rule. It is acceptable if they have a soft smile, but they must not be laughing with their mouths wide open. The baby’s face should be centered, not tilted to one side, and they must be looking at the camera with their mouth closed if possible.
- How to Capture the Shot: The easiest way to photograph a newborn is to lay the baby down on their back on a plain white or light grey sheet. Ensure the lighting overhead is bright and even to avoid shadows falling onto the baby’s face or the sheet. Take the photo from directly above, looking down at the baby. Alternatively, you can drape a white cloth over a car seat and photograph the child sitting securely.
Print Quality and Digital Resolution
Once the photograph is successfully captured, the way it is printed or saved digitally is subject to its own set of stringent technological rules.
Printed Photographs
If you are submitting a physical application at the consulate or through a third-party agency like VFS Global, you will need to provide physical prints. Most applications require two recent photographs.
- Paper Quality: The photos must be printed on normal, high-quality photographic paper. Standard printer paper or cardstock will be immediately rejected because it leads to poor-quality resolution.
- Finish: The photos should ideally have a matte finish, though high-quality glossy finishes are sometimes accepted. Matte is strongly preferred because it does not reflect the harsh overhead lighting when the officer scans the document.
- Recency: The photos must be recent and cannot be more than six months old. If you submit a photo that matches an older visa in your passport from two years ago, the officer will know the photo is outdated and will reject it. You must look like your current self; if you have dramatically changed your appearance, get a new photo taken.
- Damage: The photos must be in sharp focus, clear, undamaged, and of high quality with no ink marks, creases, or tears. They must be submitted unmounted.
Digital Photographs
If you are applying through a digital portal or need to upload your photo as part of an online pre-enrollment process, you must follow digital specifications.
- Resolution: The image should be scanned or captured at a minimum resolution of 400 to 600 DPI (dots per inch) to ensure sharp focus and clarity.
- Pixel Dimensions: Digital dimensions typically require a minimum of 552×630 pixels.
- File Format: The image must generally be saved as a standard JPEG or JPG file. PDF, BMP, TIFF, or GIF formats are often not accepted by consular upload portals and may result in application rejection. The file size should generally be kept under 120 KB to 500 KB, depending on the portal.
- No Digital Alterations: You are strictly forbidden from using Photoshop, social media filters, or AI enhancement tools to alter your appearance. You cannot digitally remove blemishes, smooth your skin, or electronically edit the background. The photo must be an authentic, unedited representation of your face. If you are struggling with uploading files to the government scheduling system, you can learn more about managing digital portals in our guide on Booking Your Italian Visa Appointment: Tips and Tricks.
Where to Get Your Italian Visa Photos Taken
Given the incredibly specific 35×45 mm requirement and the strict biometric rules, you must be careful about where you source your photographs.
Professional Photography Studios
The safest and most reliable option is to visit a professional photography studio. When you book the appointment, explicitly state that you need “European standard 35×45 mm visa photos” rather than standard US or local passport photos. Professional photographers understand lighting, background contrast, and specific face-to-frame sizing ratios, ensuring your photos will pass the consular check with flying colors.
Retail Pharmacies and Post Offices
In countries like the United States, places like CVS, Walgreens, FedEx, or the local Post Office offer passport photo services. Proceed with extreme caution here. Most of these retail machines are hard-coded to print US standard 2×2 inch photos. If you simply ask for a “passport photo,” they will hand you a 2×2 inch print. You must explicitly ask the clerk if their system has an international template for 35×45 mm photos. If they hand you a 2×2 inch photo and tell you to “just cut it down yourself,” refuse the service. Manually cutting a larger photo often ruins the required 70-80% face coverage ratio, resulting in a rejected application.
Online Passport Photo Services
There has been a surge in highly reliable online visa photo tools and mobile applications. These services allow you to take a photo with your smartphone against a plain wall. You upload the photo, and their software utilizes AI to automatically crop the image to the exact 35×45 mm Italian standard, remove any background shadows, and check for biometric compliance. They then mail you the physical high-quality prints or provide a digital file you can print yourself at a local photo kiosk. This is often the most convenient and cost-effective method.
Taking the Photo Yourself
Taking a DIY visa photo at home is risky but possible if you have a high-quality digital camera, excellent natural lighting, and a solid understanding of the sizing parameters.
- Stand about 1.5 feet away from a plain white or light grey, well-lit wall.
- Ensure you are facing a window that provides even, natural light across your entire face. Do not use a harsh overhead room light that casts shadows under your eyes and nose.
- Have another person take the photo from roughly 4 to 5 feet away, keeping the camera exactly at eye level. Do not take a selfie; the focal length of a front-facing phone camera distorts the geometry of the face (making the nose appear larger and the ears smaller), which will fail biometric scanning.
- Use specialized software to crop the photo exactly to 35×45 mm before printing it on high-quality matte photo paper.
Common Mistakes That Lead to Photo Rejection
Even after reading the guidelines, applicants frequently make minor errors that compromise their entire application. Submitting a flawed photo is one of the most easily preventable hurdles.
- Smiling or Expressions: The most common mistake. Keep your face completely neutral and your mouth closed.
- Wrong Dimensions: Submitting a 2×2 inch photo instead of the strictly required 35×45 mm.
- Old Photos: Submitting a photo that is older than six months.
- Poor Lighting: Photos with heavy shadows on one side of the face or shadows cast on the background.
- Obscured Features: Hair falling over the eyebrows, or thick glasses frames and glare blocking the eyes.
- Low Print Quality: Printing the photo on standard A4 computer paper instead of glossy/matte photo paper, resulting in a pixelated or blurry image where the face is not clearly visible.
Conclusion
Securing an Italian visa is a rigorous administrative process, and the photograph you submit is the literal face of your application. The strict 35×45 mm biometric standards enforced by the Italian consulate are not arbitrary; they are critical security measures required by the European Union’s Visa Information System. By paying meticulous attention to your sizing, background, lighting, and facial expression, you can avoid the frustration of a sudden rejection at the consular window.
Whether you choose to visit a professional studio or use an AI-assisted online photo generator, ensure that you explicitly request the Italian and Schengen specifications. Remove your glasses, keep your expression neutral, and ensure your photo is fresh and printed on high-quality matte paper. By getting your photo perfectly right the first time, you clear one of the most common hurdles in the immigration process, leaving you free to focus on planning your exciting journey to Italy.
References
Primary sources (official)
- VFS Global Italy – Photo Specification (Long Term Visas): https://visa.vfsglobal.com/one-pager/italy/nepal/english/research_photospecs.html
- VFS Global Italy – Visa Information (Algeria): https://visa.vfsglobal.com/one-pager/Italy/Algeria/english/
Other helpful sources
- TATA AIG – Italy Visa Photo Size & Photo Requirements: https://www.tataaig.com/knowledge-center/travel-insurance/italy-visa-photo-size
- Atlys – Italy Visa Photo Requirements (Size & Specification): https://www.atlys.com/tools/italy-visa-photo-maker
Disclaimer
The information provided in this article is for educational and informational purposes only and does not constitute official legal or immigration advice. Visa regulations, application requirements, and biometric photo specifications are subject to frequent changes by the Italian Ministry of Foreign Affairs and the European Union. Always consult the official website of the Italian embassy or your designated regional consulate for the most current, personalized guidance regarding your specific visa application requirements.